How to Make Sims 4 Hair From Scratch
Hello!  This tutorial is going to show you how to make clay hair for the Sims 4 from scratch. If you have any questions, feel free to post them!
What you will need
Sims 4 Studio (I'm using Harmony)
Blender 2.70
Any 2D photo editor
Basic knowledge of meshing in Blender
Step 1.
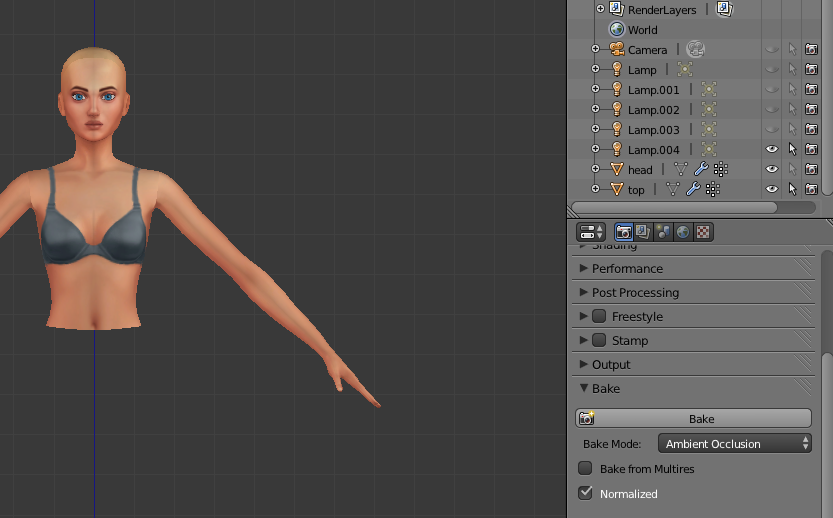
Open blender 2.70, and export the sims 4 studio model rig. For hair, you only need the head and top, depending on how long you want the hair to be.
Step 2.
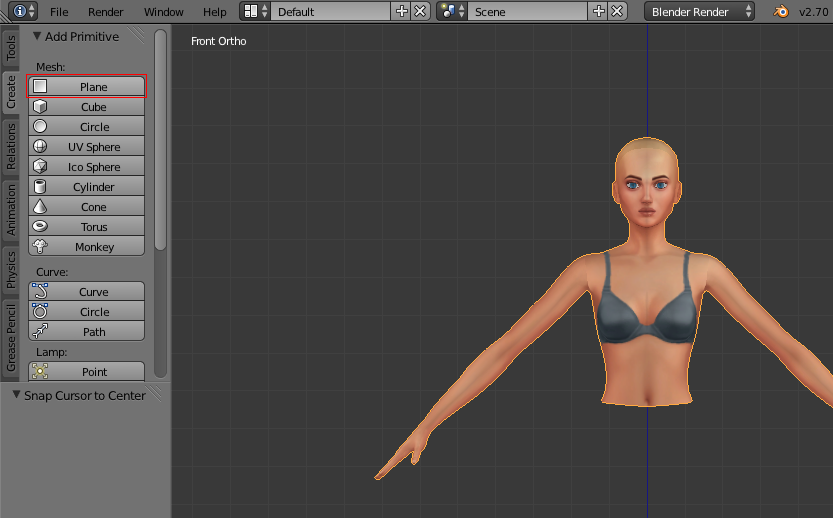
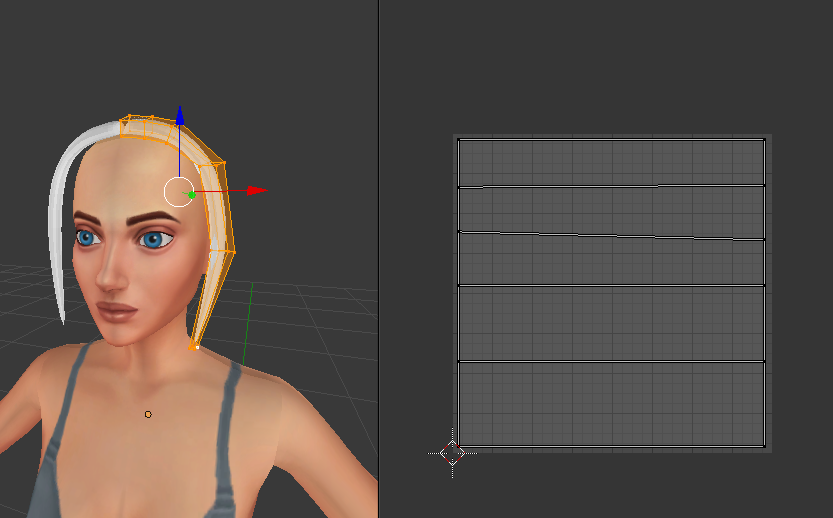
Create a plane object. You can do this by going to the left menu. Pushing T on your keyboard will pull it out. Under create, click on plane. It will then spawn a plane into the 3D viewer.
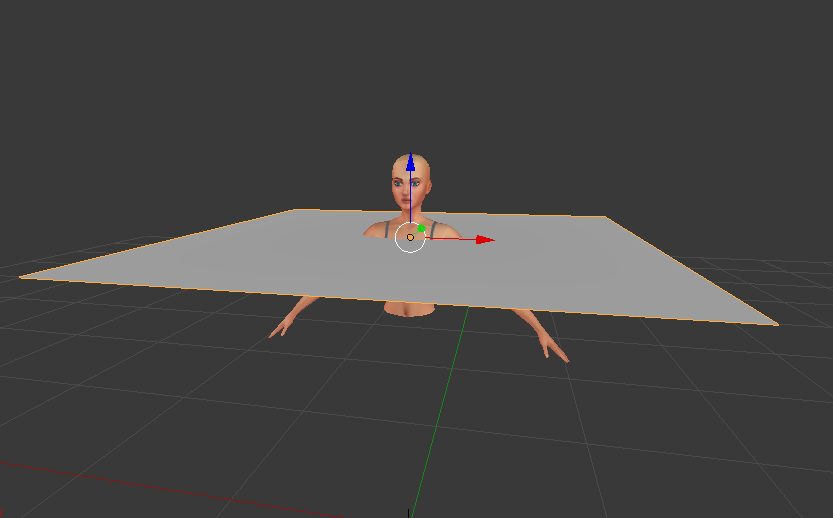
In edit mode, resize the plane to be smaller by pressing S on your keyboard and place it on either the left or right side of the z axis. It's not crucial to have it on one side, but it is if you're going to mirror the object, which I'm going to do.
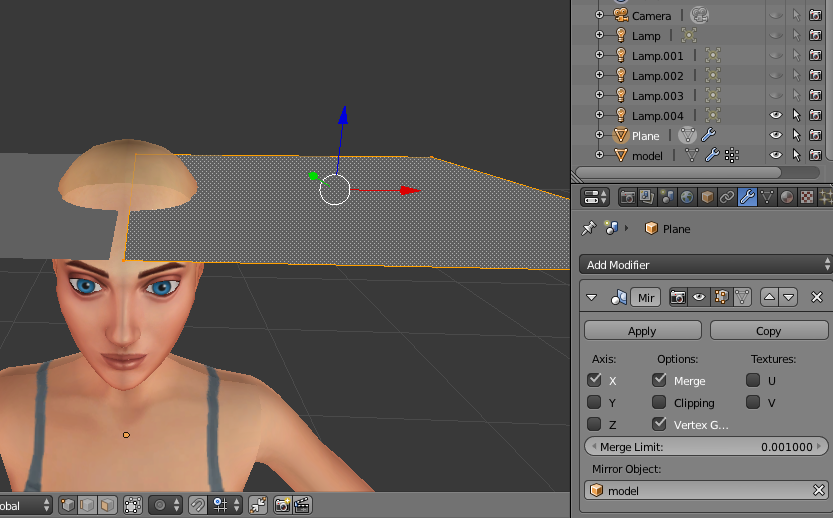
make sure under mirror object, you have selected your model.
Step 3.
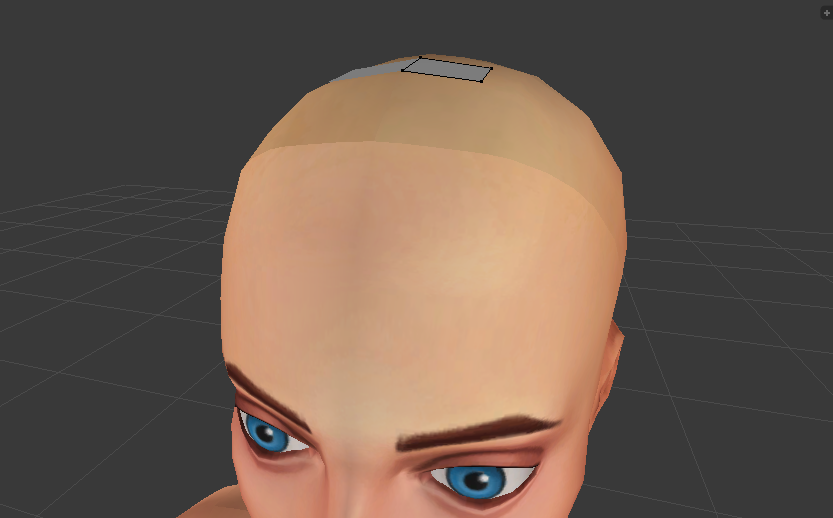
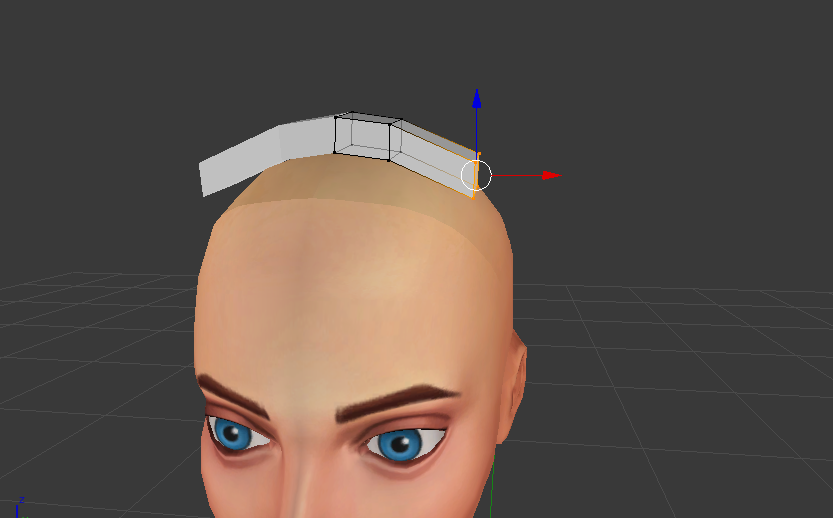
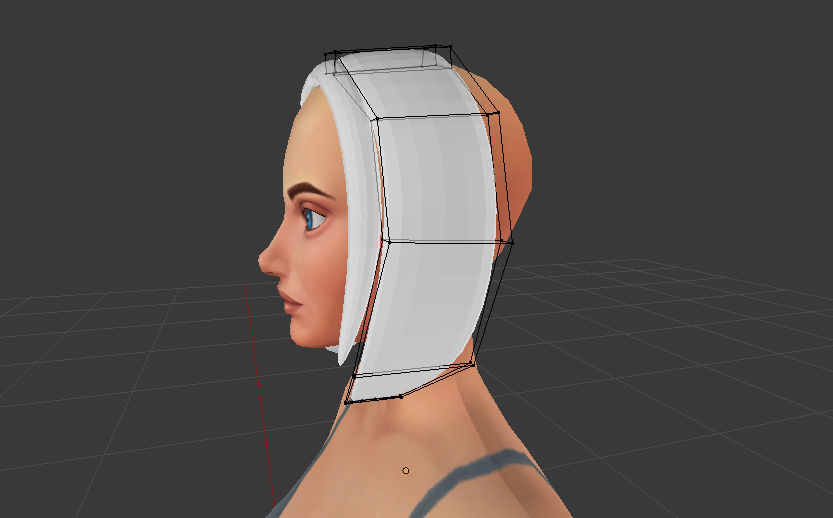
In edit mode, I'm going to make some bangs. Resize your plane by pushing S and then x , z , and y. Make it a small rectangle on top of the head. I'm going to make my geometrical bangs on the right side so it can then mirror onto the left. On your numpad, push 3 to go to the right side view. Alternatively, you could go to view > right.
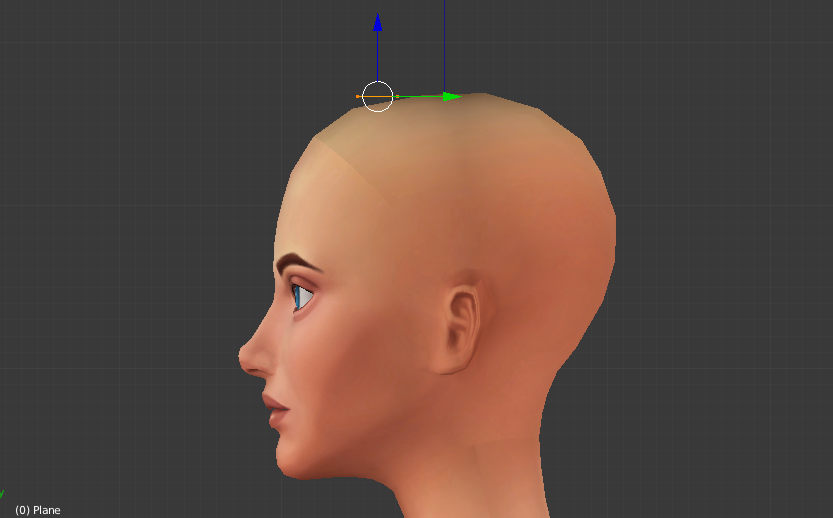
here you can see that the plane isn't exactly "hugging" the head. to correct this, first click this little box

this makes it so you can see through 3D objects in edit mode to see their faces and vertices.
Select the two vertices and move them downwards.

Then face the model, and continue making your mesh hug the head.
Step 4.
After that, select your whole plane in edit mode and push E on your keyboard. This will extrude your mesh out.
Put the new selection wherever you like. The higher you make it, the thicker the hair will look. Once you've decided, select the side of the block and extrude that out as well. This will make a hair strand. For every curve you want, extrude the hair more so it won't go through the model's head.
Size down your selection as it gets longer to show thinning hair.
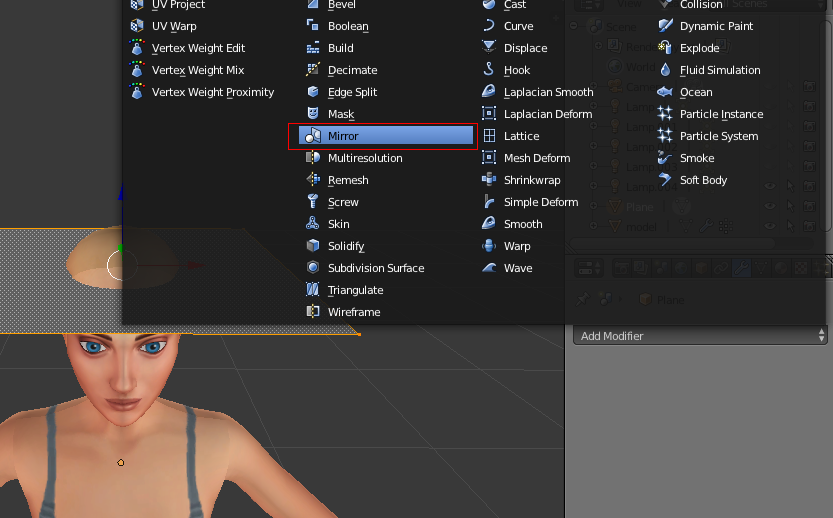
Once you've extruded it enough, go back into object mode. Save your project. This is for just in case your Blender crashes. Go into modifiers and add subdivision surface.
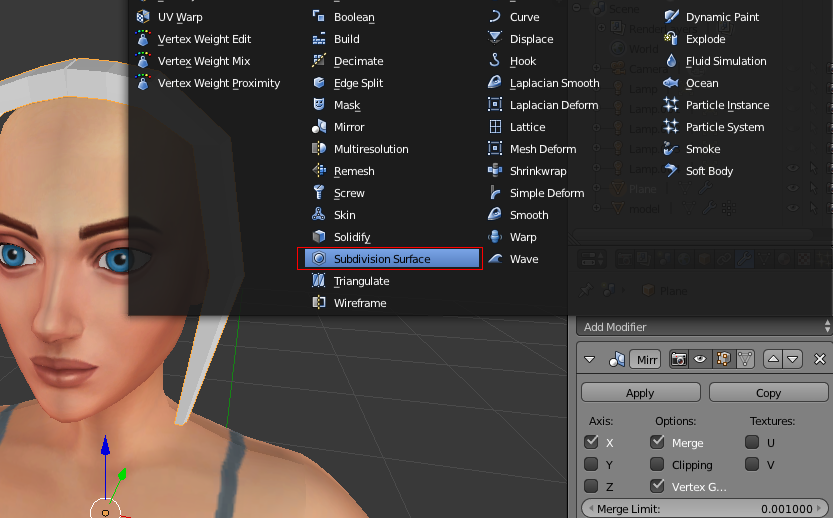

this will make your mesh very smooth. But be careful to not scale the view too high or it will crash your Blender.
Step 5.
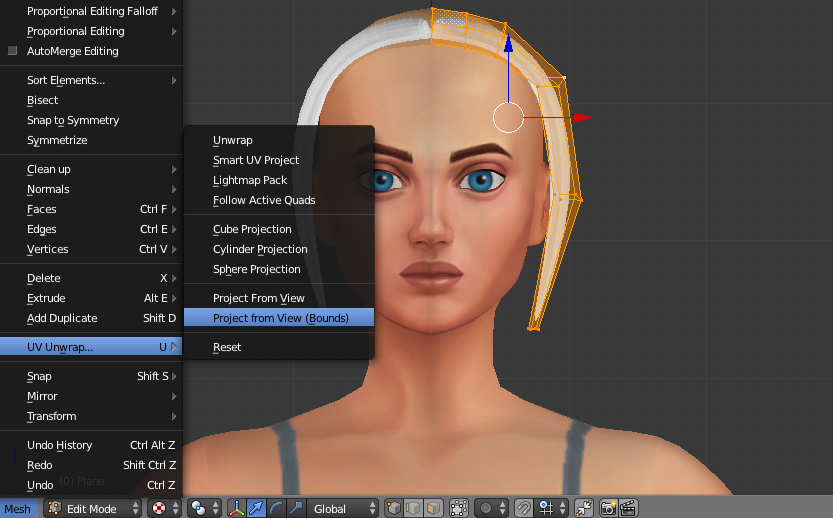
On your numpad, press 1 to view the front. In edit mode, select all of your mesh and unwrap it by project from view. You can do this by going to mesh > uv unwrap > project from view.

In the uv editor, rotate parts of the uv to make it straight. Then select the edges of the uv and press W on your keyboard. After pressing align auto, it'll make it straight. Do the same on the other side of your uv. Resize it to make it fit the square. Then select the whole uv and press W again. Then remove doubles uv. If you want, you can add a hair texture in blender.
Step 6.
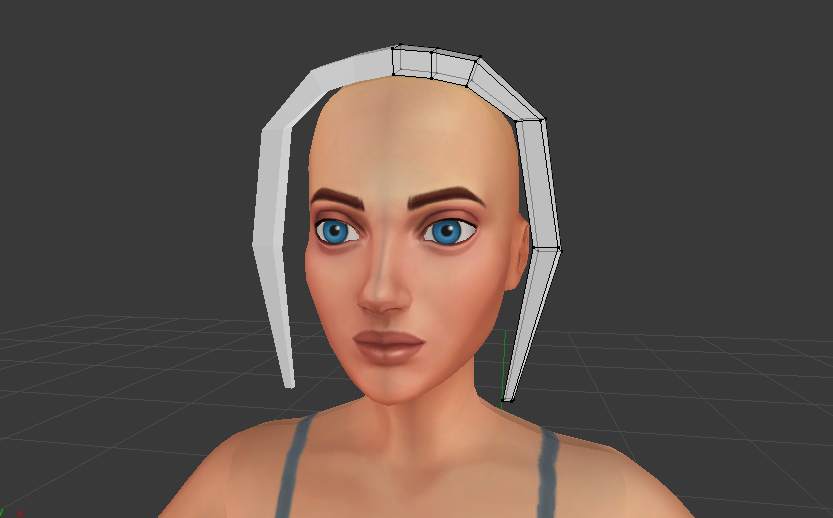
Now copy and paste the mesh in object mode. On your new mesh, go into object mode, and resize it to take up a lot of room on the head.
keep resizing and extruding until it covers the whole head.
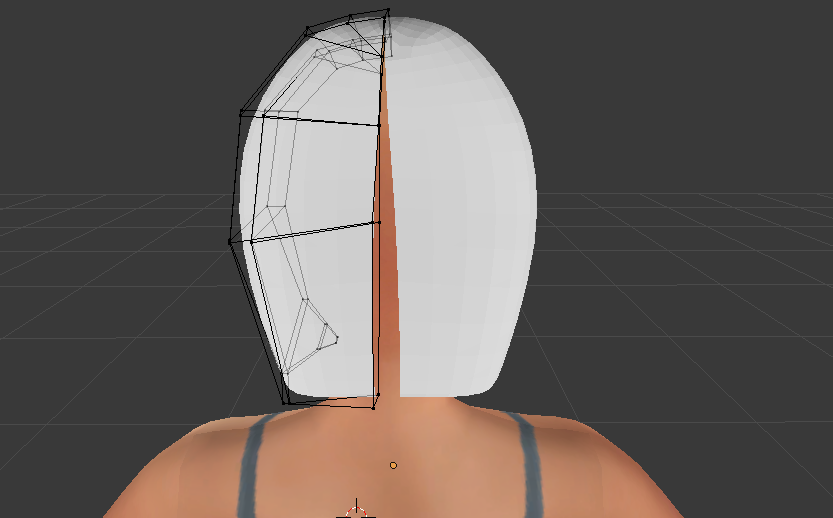
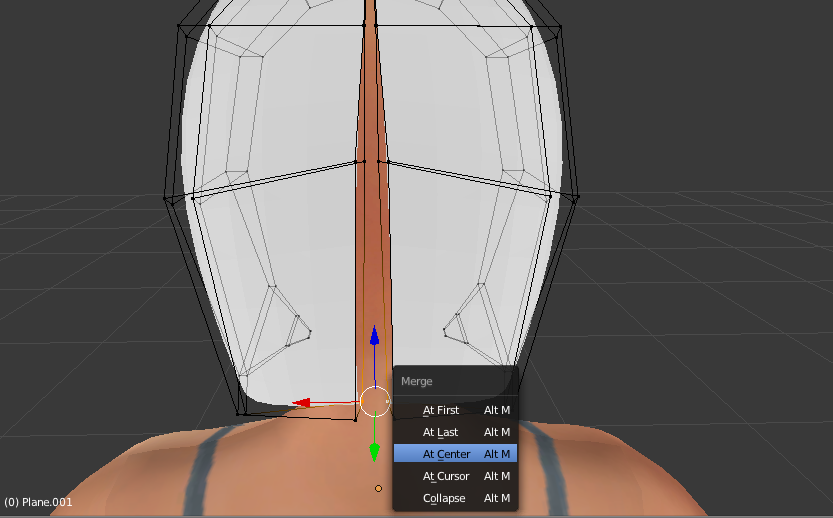
Once you're ready to pull the backs together, apply the mirror modifier and select each two vertices, press alt + m on your keyboard, and merge them together.
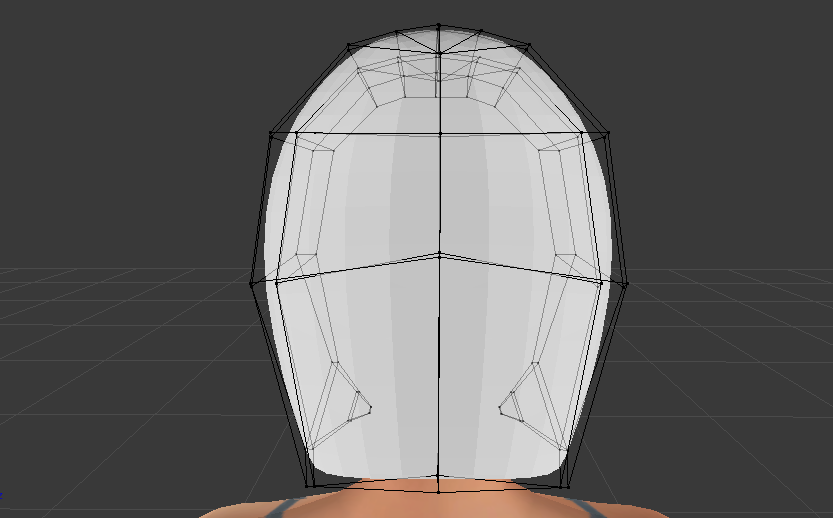
after that, I changed the bangs a little bit and joined the two meshes together.
And now we're done with the initial hair mesh!
Step 7.
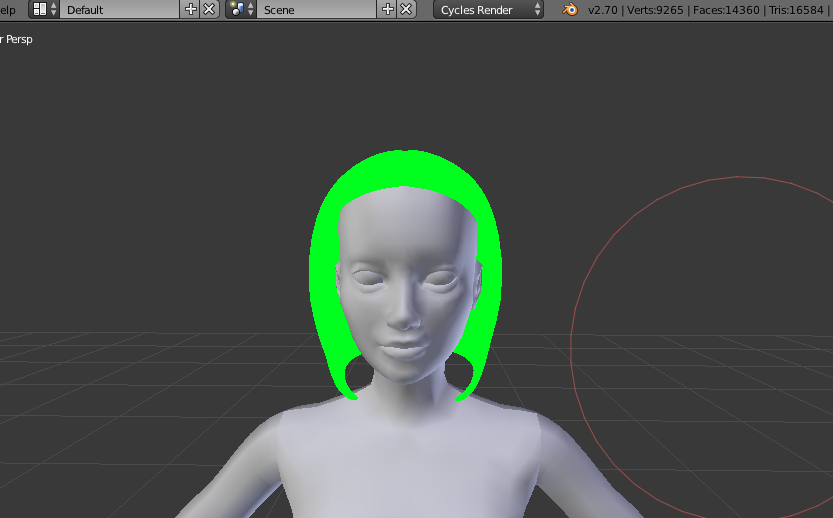
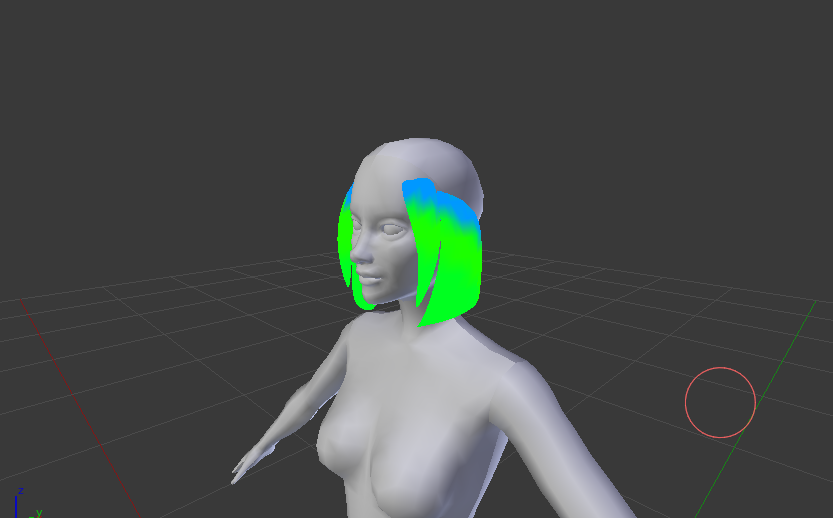
Now we need to add vertex and weight paints. We'll first do vertex paint. Go into cycles render and vertex paint mode. If you were making a hair that had to do with the scalp, or is hugging the head, paint it a blue color. Anything else should be green. Save it.
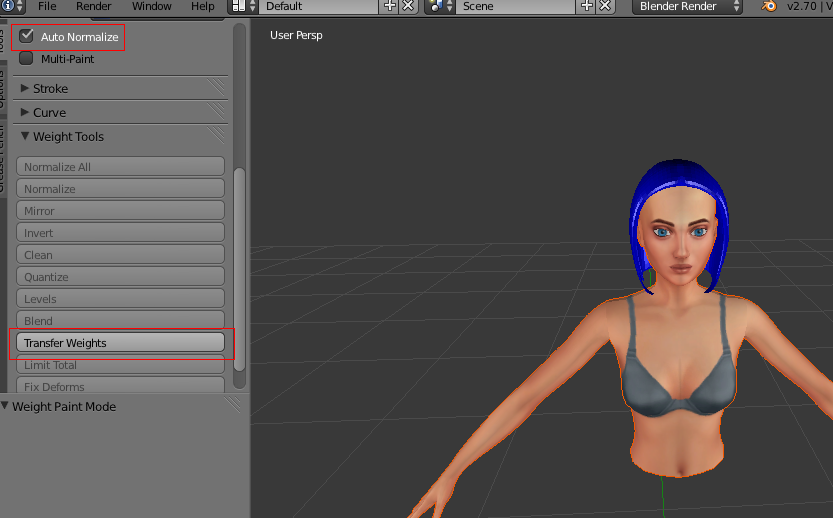
And now, it's time for the weight transfer. But before we do that, go into object data. Under uv maps, rename your uv map uv_0 and add one named uv_1. Check out this tutorial by untraditionalnerd if you want to learn how to make uv_1 for hair.
Append a reference mesh. Select your hair mesh and then the ref. Go into the weight paint mode and tick auto normalize and then transfer weights. Make sure the method is nearest vertex.
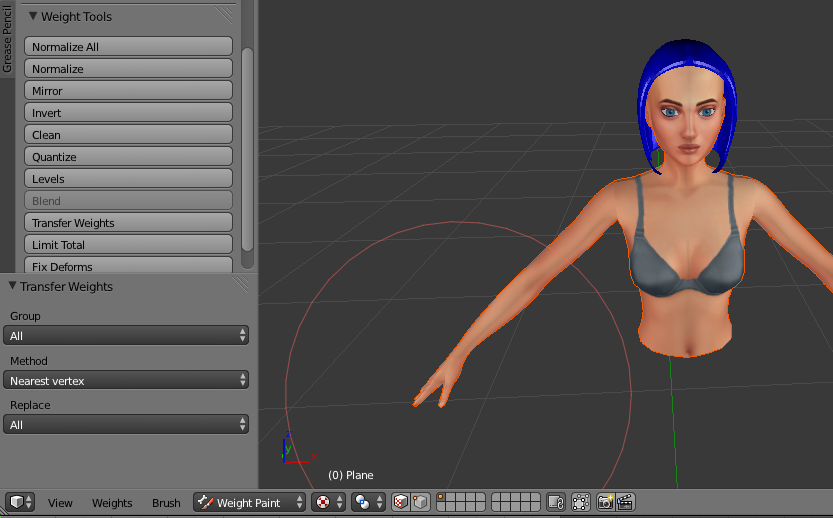
Then check to see if everything is properly weighted under vertex groups. You can delete the weights you don't need. (You only need b_Head_ , b_R_Mid0 , b_Spine2_ , b_CAS_L_Breast , and b_CAS_R_Breast, unless it's a really long hair.)
Step 8.
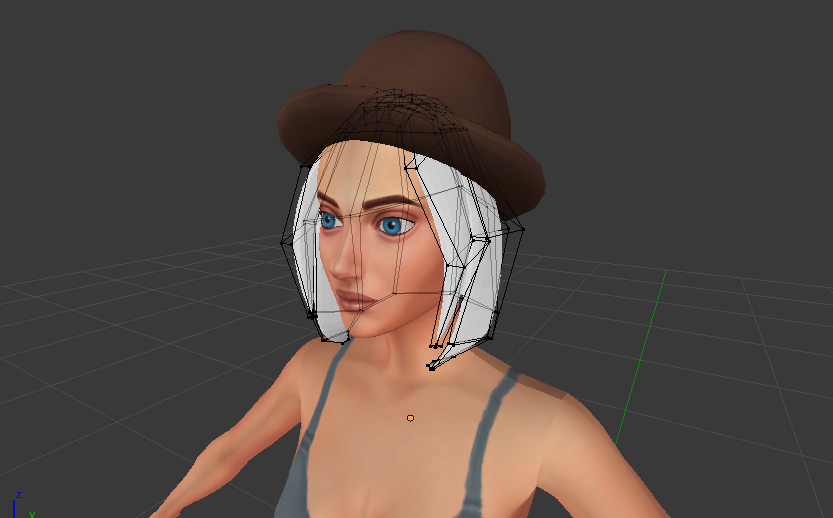
Now time for the hat chops! Copy and paste your hair mesh two times. I'm going to rename my meshes s4studio_mesh_# to be more organized. Also, now is the time to add cut numbers to your meshes. Make sure this is in order or it'll make a mess in game. The main hair mesh needs the cut number of 0002. The second hair mesh, the chop that goes straight across the hair, has a cut number of 0000. And finally, the last hair mesh, the one that is chopped at an angle, has the cut number of 0001.
Append two hats that represent two different hair chops. This will be the reference for what hair you need to hide. I'm going to append newsboy(the chop that goes straight across) and bowler(the chop that is at an angle). Go to the mesh you want to chop and hide all others. In edit mode, size the top down. This works because we haven't applied our subdivision surface modifier yet.

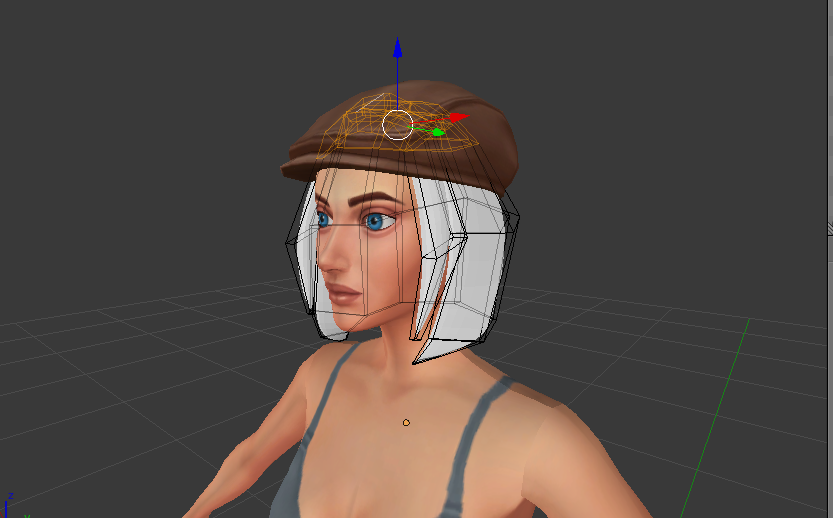
Check to make sure everything is in the right place. Once it is, go to the next mesh and do the hat chop as well.
You can now apply the subdivision modifiers.
In vertex paint mode, you need to go into every hat chop and make what's near the scalp a blue color.
Then make every other LOD. I suggest to decimate the hair by 50%
Step 9.
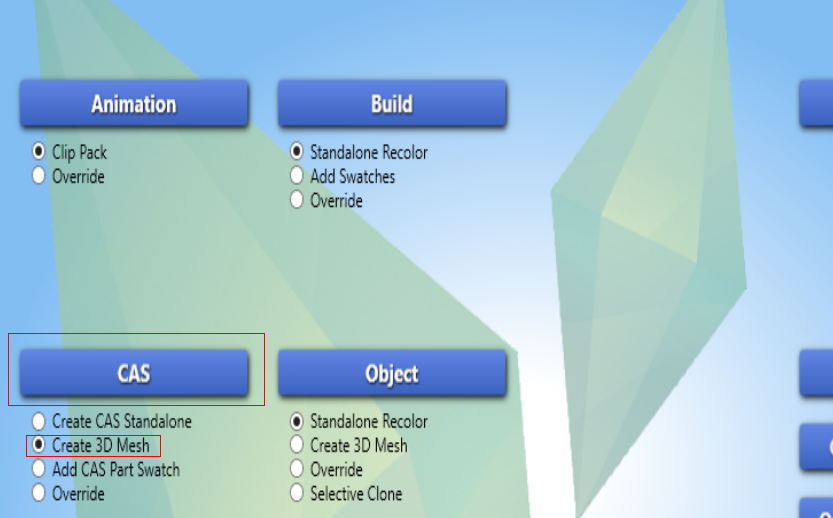
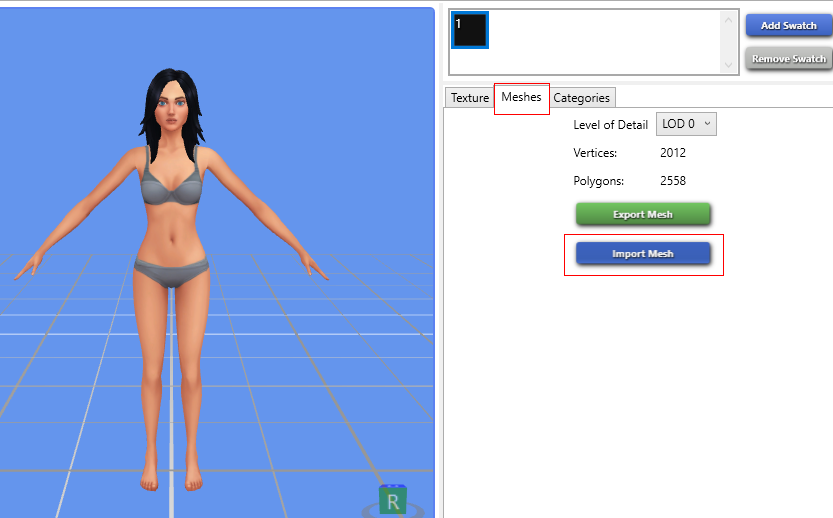
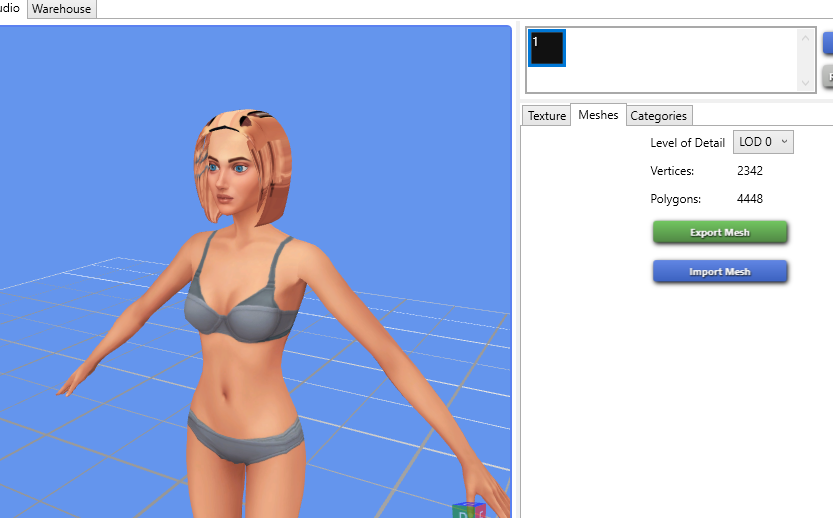
Now it's time to pop this into Sims 4 Studio! In s4s, create a CAS 3D mesh
Next, select any hair, as long as it has a geometry of three. Save it as a package and import your blend file.
Now we need to go fix the uv. In blender, open the uv map and open your uv template. I'm using this one.
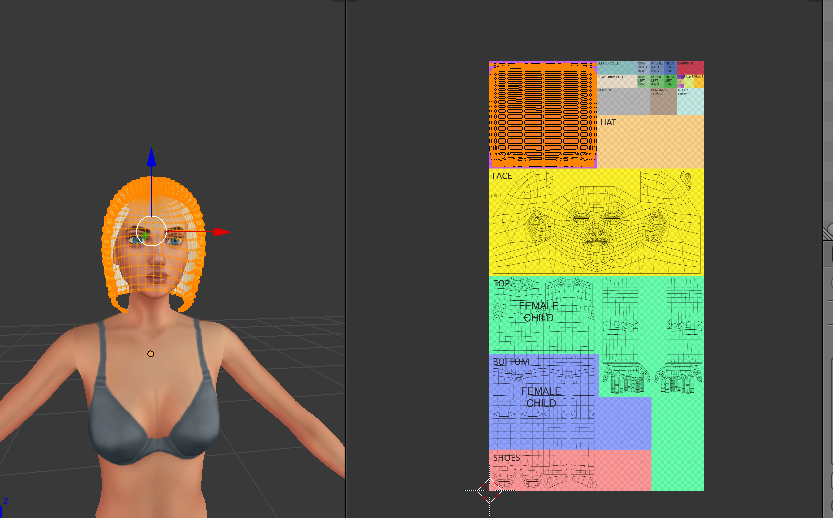
Put all of the hair meshes in the same place on your uv template and save. Now you could either bake the texture or just use your template to know where the uv is. I'm going to do the latter because I'm lazy

And then delete the template layer, save, and pop that into s4s too.
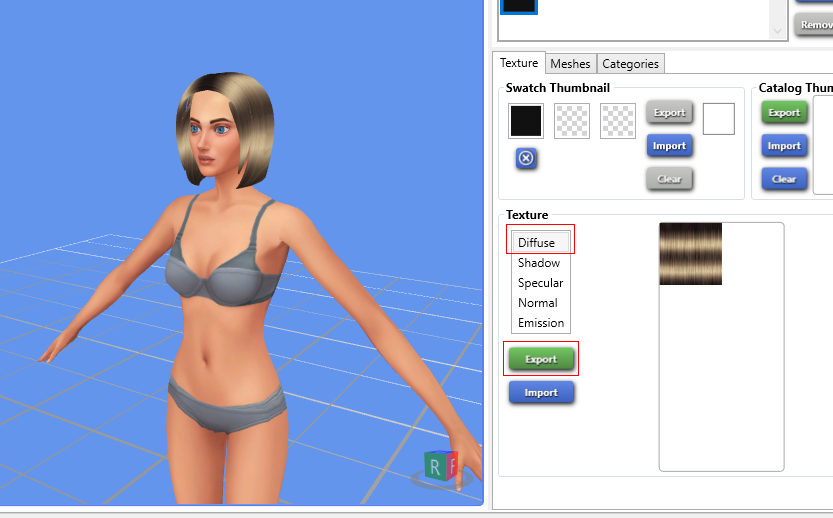
Now just make all the other maps blank or actually create the map. I'm going to leave them blank for the sake of the tutorial. Also, don't forget to add the right categories.
Put it in game and see if there's anything else you need to do. If not, congratulations! You've created hair.
How to Make Sims 4 Hair From Scratch
Source: https://sims4studio.com/thread/10406/create-clay-maxis-hair-scratch
0 Response to "How to Make Sims 4 Hair From Scratch"
Post a Comment